Making a unique, modern LED headboard is a fun project that can be built and mounted in a weekend for only a few bucks. This article will cover materials and products needed to complete the project; as well as a few helpful tips to guide you along the way. Here is a list of materials you will need:
  Furring Strips: $1 |  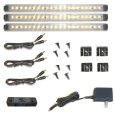 |
Total cost: $76
Other miscellaneous materials include screws and construction adhesive.
Other miscellaneous materials include screws and construction adhesive.
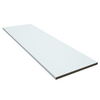
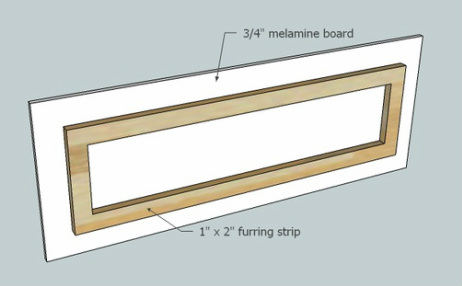
First, start with a sheet of melamine. This will be the primary structure of your headboard. Melamine is a building material that has similar properties to a laminate countertop, but is sold in thinner sheets that are dimensionally similar to plywood and drywall. Melamine is also commonly used to build cabinets and shelving. If you prefer to keep this process as simple as possible, purchase a pre-cut shelf that comes in a variety of sizes. It comes in white but can be painted a desired color to match your bedroom. Don’t forget to cover the unfinished edges of your headboard with BAND-IT iron on edging for a professional look.
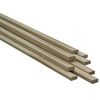
Once you decide on the size of your headboard and prepare the melamine sheet or shelf, it is time to add supports to mount the headboard on the wall. On the back side of your melamine, anchor four 1x 2 furring strips to the back of the
panel. Space the strips offset 2 inches inside the perimeter of the headboard. (Tip: use liquid nails or equivalent construction adhesive and appropriately sized stainless wood screws that won’t penetrate the outer surface of the headboard…ouch!) If you have a 1 inch furring strip and ¾ inch sheet of melamine, your screws should be 1.5 inches long. Pre drilling the melamine with 1/8th inch pilot holes is necessary. The diagram below illustrates the appropriate arrangement of your headboard.
panel. Space the strips offset 2 inches inside the perimeter of the headboard. (Tip: use liquid nails or equivalent construction adhesive and appropriately sized stainless wood screws that won’t penetrate the outer surface of the headboard…ouch!) If you have a 1 inch furring strip and ¾ inch sheet of melamine, your screws should be 1.5 inches long. Pre drilling the melamine with 1/8th inch pilot holes is necessary. The diagram below illustrates the appropriate arrangement of your headboard.
Backside of headboard
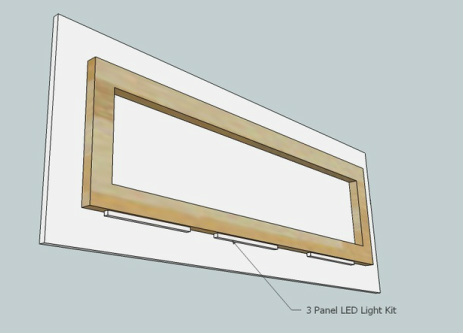
Next using the LED Deluxe 3 panel kit, mount the LED light bars on the bottom furring strip, facing down. All supplied hardware with the kit should be sufficient. Before hooking up the cables for the LED light strips, the headboard must be mounted on the wall. It is recommended to use 3 inch drywall screws to do this. Find at least 2 studs on the wall and fasten the furring strips to the wall by driving the 3 inch screws at an angle into the studs. (Tip: it is probably necessary to use an extender on your drill or driver in order to maintain enough clearance from the melamine as you fasten the screws.) Add as many screws as sufficient on the top and bottom furring strips. Having one or two helpers for this step is highly recommended.
Backside of headboard
(Mount 3 LED light strips under bottom furring strip)
Now that your headboard is mounted, connect the included cables and power supply to your LED light strips. Ideally, an electrical outlet directly behind the headboard would help conceal all cables. If not run the white power cord behind your bed and plug it in to the closest outlet.
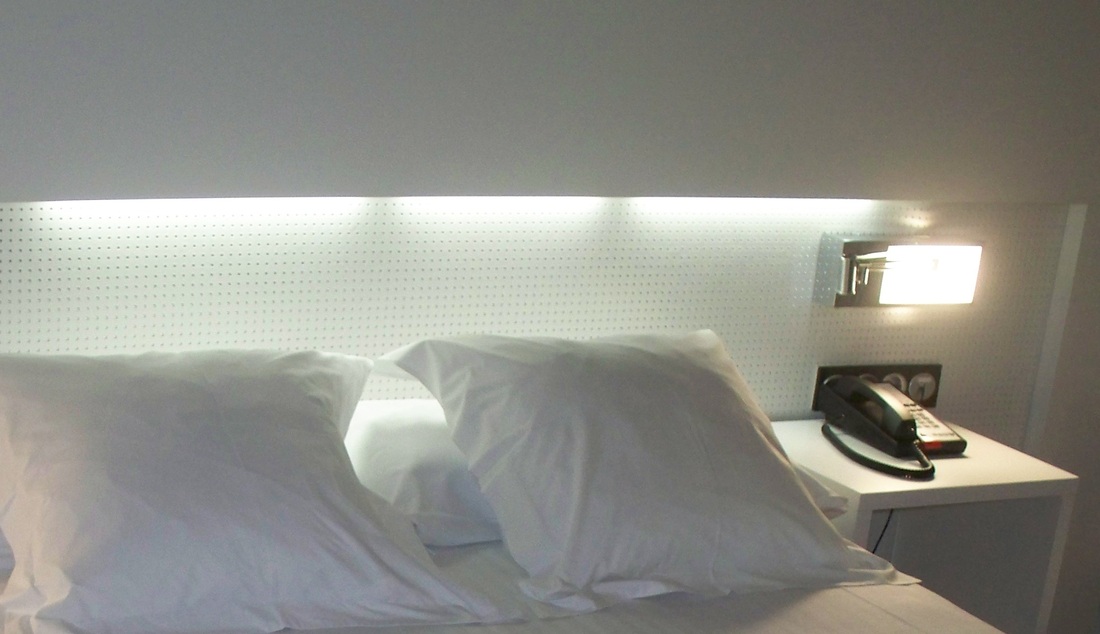
That completes the install! Light up your headboard and enjoy your DIY luxury masterpiece.
That completes the install! Light up your headboard and enjoy your DIY luxury masterpiece.
 RSS Feed